MOV files are common, especially if your footage came from an iPhone, a Mac workflow, or certain editing apps. The problem is not that MOV is “wrong,” it’s that MOV can be unpredictable across players, browsers, TVs, and older devices depending on what’s inside the file. If you want one format that reliably plays almost everywhere, converting MOV to MP4 is usually the cleanest solution for broad compatibility.
This guide explains the practical differences between MOV and MP4, then walks you through a step-by-step conversion workflow that protects quality, keeps audio intact, and helps your new file work on “all the things”: Windows PCs, Android phones, smart TVs, tablets, and web players.
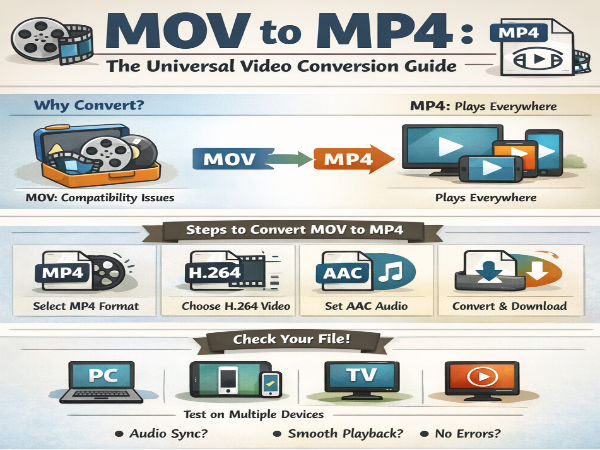
Why MOV files cause compatibility issues
MOV is a container format. Think of a container like a lunchbox: it holds video and audio streams, and sometimes extra tracks like subtitles or metadata. Compatibility problems happen because different devices support different codecs and stream types inside that lunchbox. You might have a MOV that contains a codec some devices decode easily, and another MOV that contains a codec they struggle with. That’s why one MOV plays perfectly on your laptop, while another stutters, shows a black screen, or fails entirely on a TV.
MP4 is also a container, but it has become the universal delivery standard for online playback and device support. Most modern systems are tuned to play MP4 smoothly, especially when it contains H.264 video and AAC audio.
Understanding MOV vs MP4 containers
Both MOV and MP4 can hold similar types of streams, but MP4 is more consistently supported across apps and hardware decoders. The real key is the codec:
If your MOV uses H.264 already, the issue might be container support or metadata quirks.
If your MOV uses HEVC (H.265) or ProRes, some devices may not support it or may play it inefficiently.
When you convert to MP4, you’re typically choosing a widely-supported combination:
MP4 container
H.264 codec (video)
AAC codec (audio)
That combo is the “universal adapter” of video.
Step-by-step conversion process using online tools
If you want a quick, repeatable conversion path, online converters can be convenient, especially when you need results fast and you’re not doing advanced editing.
Step 1: Pick an MP4 target that prioritizes compatibility
Select MP4 as the output format. This is the most broadly supported container for delivery across devices and platforms.
Step 2: Choose a codec that plays everywhere
Pick H.264 for video. H.264 is still the safest option for wide playback support. If you’re unsure, default to H.264. If a tool lets you pick a profile, “High” is common for modern devices, but staying within standard H.264 settings is generally safe.
Step 3: Keep audio simple and consistent
Choose AAC audio. This is widely compatible and keeps file size reasonable. If you have multiple audio tracks and you don’t need them, drop extra tracks during conversion to reduce complexity.
Step 4: Convert and download
Use an online video converter. Just upload the MOV, select MP4, choose H.264, and convert.
Step 5: Verify before you delete the original
Do not trash your MOV immediately. Keep it as your master until you confirm the MP4 is correct.
Codec selection: maintaining H.264 compatibility across devices
If your goal is “plays on everything,” H.264 is the default winner. HEVC (H.265) can produce smaller files at similar quality, but it’s not as universally supported, especially on older hardware and certain Windows environments without the right codec support. If you are delivering to unknown recipients, H.264 reduces support headaches.
Quality settings: prevent degradation during conversion
Conversion can reduce quality if you pick low bitrates or overly aggressive compression. Here’s how to protect quality while keeping a reasonable file size:
Match the output resolution to the source when possible (don’t upscale).
Use a bitrate that suits your content. Fast motion and detailed scenes need more bitrate than static talking-head clips.
Avoid repeated conversions. Each re-encode adds artifacts. Convert from the original MOV once, and keep that MOV as the source if you need a different output later.
A strong practical approach is to export two MP4 versions:
A “delivery” MP4 optimized for size and compatibility
A “high quality” MP4 with a higher bitrate for archival or premium playback
Audio track preservation and format optimization
MOV files sometimes contain multiple audio tracks (like separate mic sources) or surround audio. If you need to preserve these, confirm your converter supports multi-track output. If you only need a single track, select the primary audio stream and remove extras. This can reduce the file size and improve compatibility with simple playback devices.
Also check audio sample rate consistency. Many workflows use 48 kHz for video. Keeping audio standard helps avoid sync problems in edge cases.
Batch conversion techniques for multiple MOV files
If you have a folder full of MOV clips, batch conversion saves time and keeps outputs consistent:
Use one preset for all files (same resolution, codec, bitrate strategy)
Name outputs clearly (e.g., keep the original filename and add “_MP4”)
Convert in smaller batches first and spot-check results before you convert everything
Batch conversion also improves workflow hygiene: you’re less likely to accidentally mix different settings across different clips.
Testing converted files across devices
Compatibility is not theoretical, it’s tested. After converting, play your MP4 on:
A Windows computer (different player apps if possible)
An Android phone
A smart TV or streaming device (if that’s part of your target audience)
A web browser player (drag-and-drop into a browser tab is a quick sanity check)
Watch for:
Audio sync issues
Stutter in motion scenes
Unexpected color shifts
Playback errors or “unsupported” messages
If it fails on a device, the most common fix is to ensure you used MP4 with H.264 video and AAC audio, and that the resolution and frame rate are reasonable.
Alternative workflows: when to keep MOV vs when MP4 is essential
Keep MOV when:
You are still editing and want the best intermediate quality
Your MOV uses a high-quality editing codec (like ProRes) for post-production
You need a master file for future edits
Use MP4 when:
You are delivering to clients
You are uploading to platforms
You need broad compatibility across devices, operating systems, and playback apps
You want smaller file sizes for sharing and storage
Quick checklist for a “universal” MP4 export
MP4 container
H.264 video codec
AAC audio codec
Resolution matches source (no pointless upscaling)
Bitrate appropriate for content
Tested on multiple devices
If you follow that checklist, you get what you wanted: a compatible MP4 file that looks good, plays smoothly, and does not force your audience into a codec scavenger hunt.