Electric Bike Conversion Kit With Battery: Complete Buyer’s Guide for UK & US Riders

Converting your regular bicycle into an electric bike has never been more accessible. With modern electric bike conversion kits with battery included, you can transform any standard bicycle into a powerful e-bike in under an hour.
This comprehensive guide walks UK and US riders through everything you need to know about choosing, installing, and maintaining e-bike conversion kits in 2026.
What Is an Electric Bike Conversion Kit With Battery?
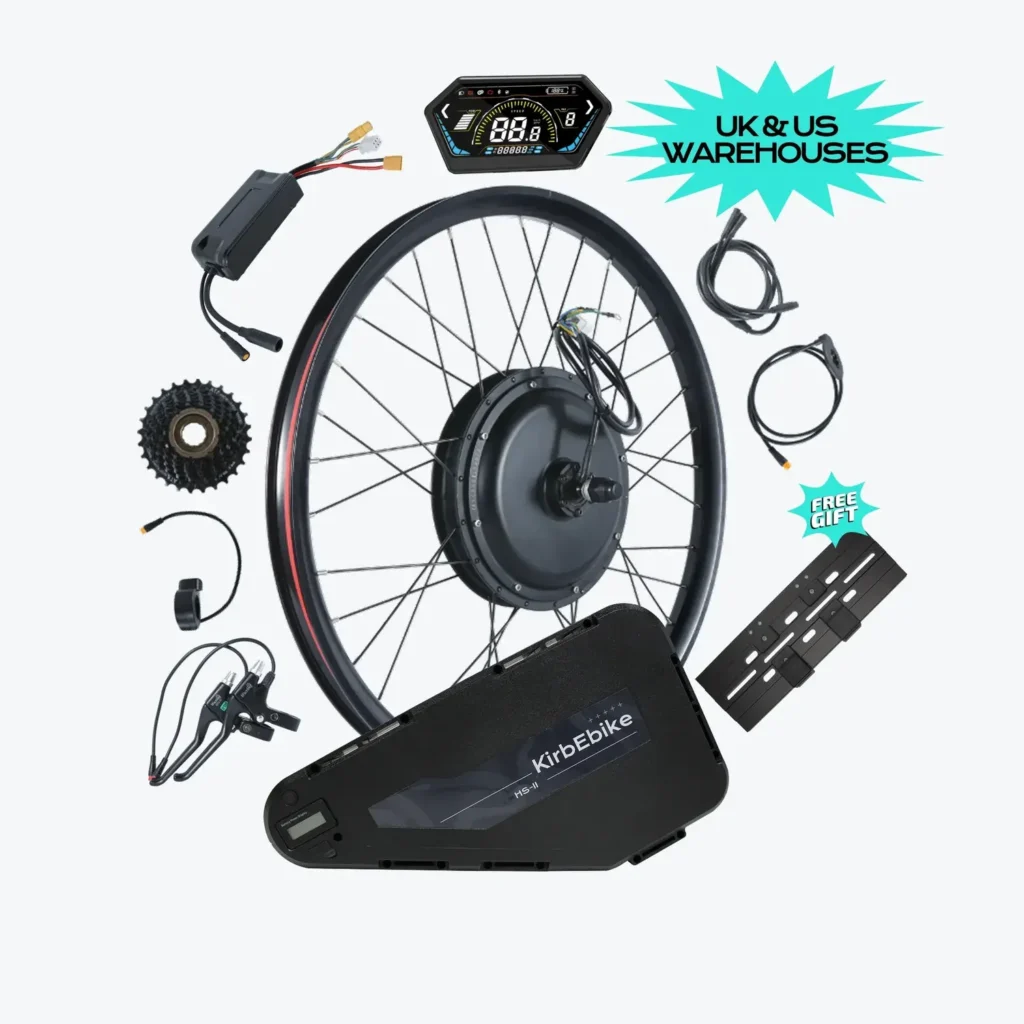
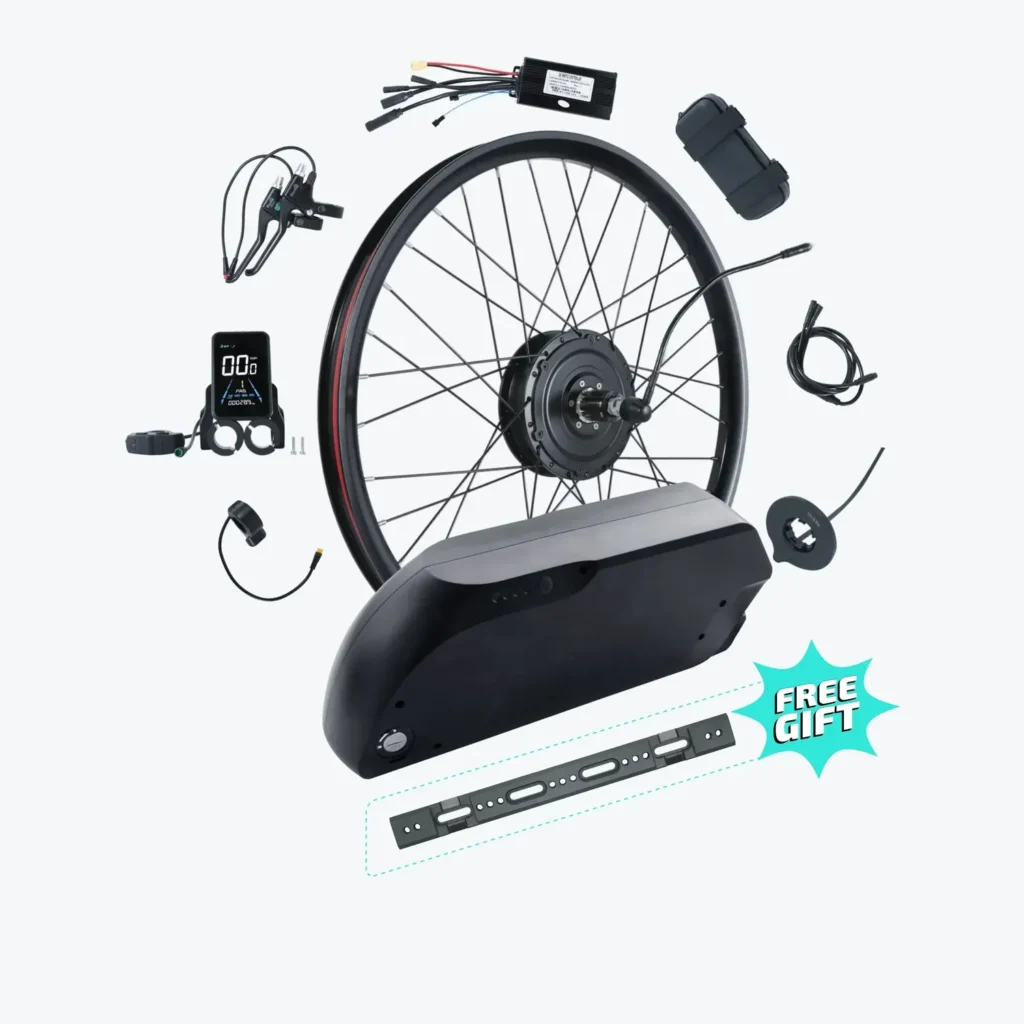
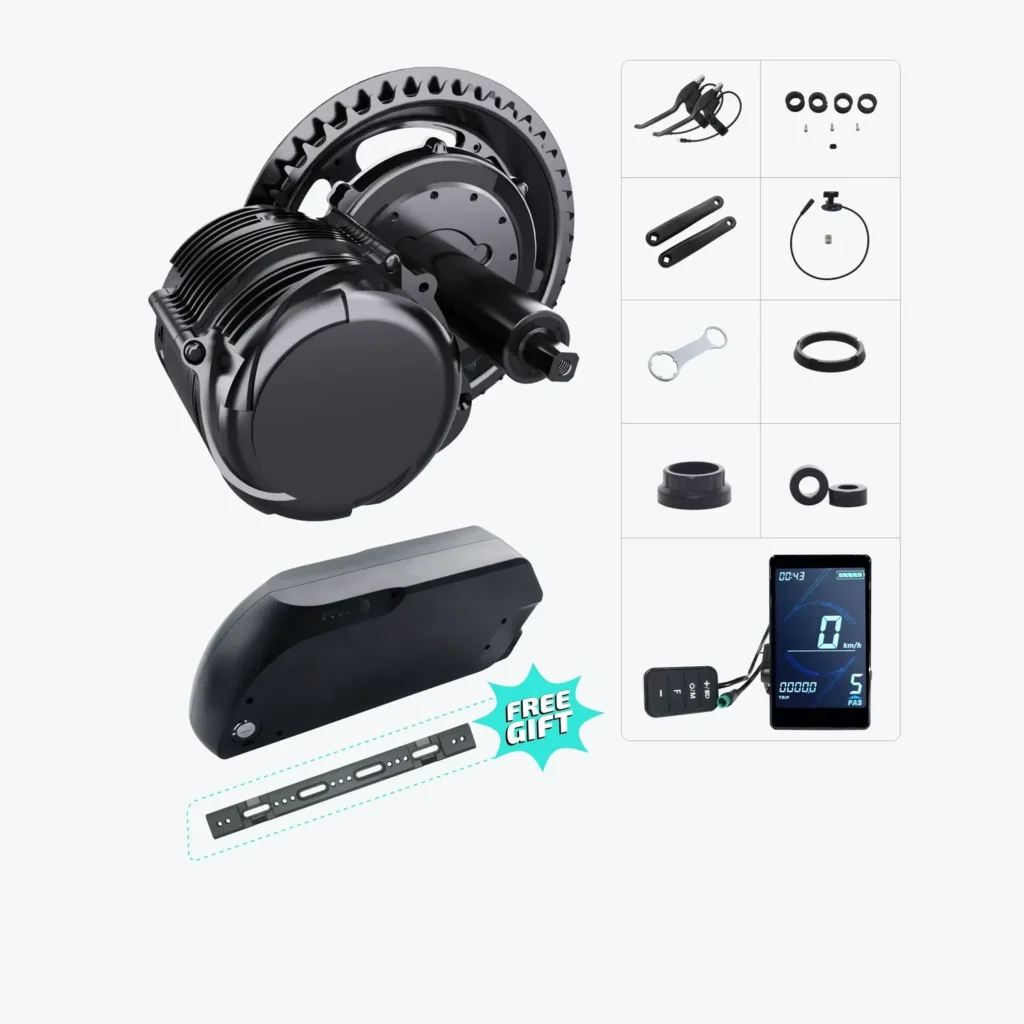
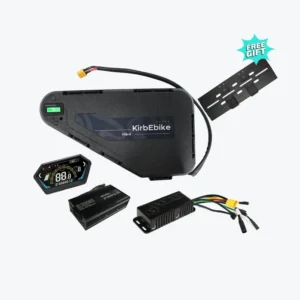
An electric bike conversion kit with battery is a complete package containing all components needed to electrify your bicycle. Unlike partial kits that require separate battery purchases, complete kits include:
- Motor wheel (front, rear, or mid-drive motor)
- Lithium battery pack with mounting hardware
- Controller to manage power delivery
- Display/computer showing speed, battery level, and distance
- Throttle for motor activation
- Pedal assist sensor (PAS) for natural power delivery
- Brake sensors for safety cutoff
- Wiring harness with waterproof connectors
- Installation hardware and tools
This all-in-one approach eliminates compatibility concerns and ensures you have everything required for a successful conversion.
Why Choose a Complete Kit Over Separate Components?
Purchasing a complete electric bike kit & battery collection offers several advantages over buying components individually:
Guaranteed Compatibility: All components are pre-matched by the manufacturer. The controller is sized correctly for the motor, the battery voltage matches system requirements, and connectors fit without adapters.
Cost Savings: Bundled kits typically cost 15-25% less than purchasing items separately. Manufacturers pass along bulk purchasing savings to customers.
Simplified Installation: Complete kits include color-coded wiring and comprehensive instructions designed for the specific component combination. You won’t encounter compatibility surprises mid-installation.
Single Warranty: If issues arise, you deal with one supplier rather than coordinating between multiple vendors. This streamlines troubleshooting and replacement processes.
Tested Performance: Manufacturers test complete kits as systems, ensuring balanced performance across all components. This results in better reliability and optimized efficiency.
Understanding Power Ratings: What Wattage Do You Need?
Motor power directly impacts speed, hill-climbing ability, and legal compliance. Here’s how different wattages perform:
250W Systems (UK/EU Legal)
- Top Speed: 25-30km/h (15-19mph)
- Range: 40-70km per charge
- Best For: Flat terrain commuting, legal road use across Europe
- Hill Climbing: Moderate assistance on gradual inclines
- Ideal Rider: Urban commuters prioritizing legal compliance
500W-750W Systems (US Class 3)
- Top Speed: 35-45km/h (22-28mph)
- Range: 35-60km per charge
- Best For: Varied terrain, faster commuting, recreational riding
- Hill Climbing: Strong assistance on most hills
- Ideal Rider: Fitness enthusiasts, suburban commuters
1000W Systems (Off-Road/Private Land)
- Top Speed: 45-50km/h (28-31mph)
- Range: 35-60km per charge
- Best For: Hilly terrain, heavy cargo, off-road trails
- Hill Climbing: Excellent torque for steep gradients
- Ideal Rider: Mountain bikers, delivery riders, adventure seekers
The electric bike conversion kit with battery at 1000W represents the sweet spot for many riders—powerful enough for challenging terrain while maintaining reasonable efficiency and range.
2000W+ Systems (Private Property Only)
- Top Speed: 50-85km/h (31-53mph)
- Range: 40-80km per charge
- Best For: Off-road recreation, private land use, extreme performance
- Hill Climbing: Outstanding torque, effortless on any incline
- Ideal Rider: Performance enthusiasts, farm/property maintenance
Battery Technology: Capacity, Chemistry, and Range
Your battery determines how far you’ll travel per charge. Understanding battery specifications helps you choose appropriately for your needs.
Battery Voltage Explained
36V Batteries: Entry-level systems suitable for flat terrain and moderate speeds. Offer good efficiency but limited power output.
48V Batteries: The most common voltage, offering excellent balance between power, range, and component availability. Compatible with motors from 250W to 1500W.
52V Batteries: High-performance systems with 8% more voltage than 48V, delivering noticeably stronger acceleration and hill-climbing without motor upgrades.
60V-72V Batteries: Extreme performance systems for 2500W+ motors, delivering motorcycle-like power with bicycle efficiency.
Battery Capacity (Amp-Hours)
Capacity determines range. Higher amp-hour (Ah) ratings store more energy:
- 10-13Ah: 30-45km range, suitable for short commutes
- 15-17Ah: 40-65km range, handles most daily riding
- 20Ah: 50-75km range, ideal for longer commutes or recreational rides
- 30Ah: 70-100km range, perfect for all-day adventures
Real-world range depends on rider weight, terrain, assistance level, and riding style. Calculate range by multiplying battery watt-hours (voltage × amp-hours) by 0.8-1.2, depending on conditions.
Battery Cell Quality
Premium batteries use name-brand cells from manufacturers like LG, Samsung, or Panasonic. These cells offer:
- Higher energy density (lighter weight for same capacity)
- Better temperature performance
- Longer lifespan (1000+ charge cycles vs. 500-800 for generic cells)
- Superior safety features
The 52V 30Ah LG battery pack exemplifies premium battery construction, using LG 21700 cells rated for 1000+ cycles while delivering consistent power output even in cold weather.
Hub Motors vs. Mid-Drive Motors: Which Is Right for You?
Motor placement significantly affects ride characteristics, installation complexity, and performance.
Hub Motors (Front or Rear Wheel)
Hub motors replace your existing wheel with a motorized wheel containing the electric motor within the hub.
Advantages:
- Simple installation (20-30 minutes typical)
- Lower cost than mid-drive systems
- Minimal maintenance (no additional wear on drivetrain)
- Quiet operation
- Throttle-only riding possible without pedaling
- Preserves your existing gears and chain
Disadvantages:
- Less efficient on steep hills (fixed gear ratio)
- Adds 3-7kg to wheel (affects handling slightly)
- More difficult tire changes
- Cannot utilize bike’s gearing system
Best For: Flat to moderately hilly terrain, commuters, riders wanting simple installation and maintenance.
Mid-Drive Motors
Mid-drive motors mount at the bottom bracket (where pedals attach) and power the chain directly, utilizing your bicycle’s existing gears.
Advantages:
- Superior hill-climbing (uses bike’s gears)
- Better weight distribution (center of bike)
- More natural pedaling feel
- Higher efficiency overall
- Easier wheel changes (motor isn’t in wheel)
Disadvantages:
- More complex installation (40-60 minutes)
- Increased wear on chain and cassette
- Generally higher cost
- Requires pedaling (throttle-only not possible)
- Slightly more maintenance
Best For: Hilly terrain, mountain biking, riders prioritizing climbing performance and natural feel.
The mid motor electric conversion kit delivers 140Nm of torque with torque sensor technology, providing seamless power delivery that feels like natural pedaling amplified.
Legal Requirements: UK vs. US Regulations
E-bike laws vary significantly between countries and even between US states. Understanding regulations ensures legal road use.
United Kingdom Regulations
To ride legally on UK roads without registration, insurance, or license:
- Maximum motor power: 250W continuous rated
- Maximum assisted speed: 25km/h (15.5mph)
- Motor must cut off when pedaling stops
- Minimum rider age: 14 years
- No throttle permitted above 6km/h (walk-assist only)
Many conversion kits offer “legal mode” settings that restrict power and speed to UK requirements, while allowing full power on private land.
European Union (Similar to UK)
EU regulations largely mirror UK rules: 250W maximum, 25km/h limit, pedal-assist only. These regulations are designed to classify e-bikes as bicycles rather than motor vehicles.
United States Regulations
The US uses a three-class system, though specific rules vary by state:
Class 1: Pedal-assist only, 20mph (32km/h) maximum, allowed on most bike paths Class 2: Throttle permitted, 20mph maximum, some path restrictions Class 3: Pedal-assist only, 28mph (45km/h) maximum, typically road use only
Motor power is generally limited to 750W (1 horsepower), though some states permit higher wattages. Always check local regulations before riding.
Private Land Use
Higher-powered kits (1000W+) are perfectly legal for private property use in both UK and US. Many riders use these systems on farms, large estates, or private trails where road regulations don’t apply.
Installation Process: What to Expect
Modern conversion kits have dramatically simplified installation compared to earlier generations. Here’s the typical process:
Tools Required (Usually Included)
- 15mm wrench for axle nuts
- Allen keys (hex wrenches) for various bolts
- Adjustable wrench for accessories
- Cable ties for securing wiring
- Electrical tape (backup)
Step-by-Step Installation (Hub Motor Kit)
Prepare Your Bicycle (5 minutes)
- Remove existing front or rear wheel
- Check frame for adequate battery mounting space
- Ensure brake type matches (disc or rim)
Install Motor Wheel (10 minutes)
- Insert motor wheel into frame dropouts
- Ensure proper spoke side orientation
- Tighten axle nuts to specified torque
- Install torque arm to prevent axle rotation
- Adjust brakes if necessary
Mount Battery (5 minutes)
- Secure battery mounting plate to frame
- Connect battery bracket or triangle bag
- Lock battery in place
- Test battery removal and installation
Install Controller and Display (10 minutes)
- Mount controller in protected location (often frame bag)
- Attach display to handlebars
- Connect display cable to controller
Connect Components (10 minutes)
- Plug motor cable into controller (color-coded)
- Connect throttle to controller
- Install brake sensors on brake levers
- Attach PAS sensor to bottom bracket
- Connect all cables to controller
- Secure wiring with cable ties
Test System (10 minutes)
- Check all connections
- Turn on display
- Test throttle response
- Verify brake sensor cutoff
- Test pedal assist levels
- Take short test ride
Total installation time typically ranges from 30-50 minutes for your first conversion. Subsequent installations go faster as you gain experience.
Mid-Drive Installation Differences
Mid-drive systems require bottom bracket removal and replacement, adding 15-30 minutes to installation time. You’ll need a bottom bracket tool specific to your frame type (typically included in complete kits).
Installation Tips and Common Mistakes
Avoid these frequent errors when installing your conversion kit:
Planning Mistakes
Not Checking Frame Compatibility: Measure your frame’s rear dropout spacing (usually 135mm for rear motors) and front fork width (100mm typically) before ordering. Some frames won’t accommodate motor wheels.
Ignoring Brake Compatibility: Ordering a disc brake motor wheel when your bike has rim brakes (or vice versa) requires additional expense and modifications.
Underestimating Battery Size: Measure frame triangle dimensions to ensure chosen battery fits before ordering, especially triangle bag batteries.
Installation Errors
Loose Axle Nuts: Motor wheels experience high torque. Insufficiently tightened axle nuts allow wheel slippage, damaging dropouts. Use torque wrenches and follow specifications.
Skipping Torque Arms: Particularly critical for aluminum frames and powerful motors. Torque arms prevent catastrophic dropout failure.
Poor Cable Routing: Cables rubbing on moving parts wear through, causing shorts. Secure all wiring away from wheels, cranks, and brake lines.
Reversed Brake Sensors: If brakes don’t cut power, sensors are likely connected backward. Swap the two sensors.
Battery Not Fully Secured: Loose batteries bounce during riding, damaging mounting hardware and electrical connections. Ensure locking mechanism fully engages.
Testing Oversights
Skipping Brake Cutoff Test: Always verify motor cuts instantly when brakes engage. Adjust sensor position or tension if cutoff is delayed.
Not Checking PAS Direction: Some bikes require reversing PAS orientation if sensor doesn’t detect pedaling. Test before your first ride.
Ignoring Strange Noises: Clicking, rubbing, or grinding sounds indicate misalignment or loose components. Address immediately before further riding.
Where to Buy: Online vs. Local
Purchasing decisions depend on priorities: price, support, and convenience.
Online Retailers
Advantages:
- Lower prices (reduced overhead)
- Wider selection
- Customer reviews and comparisons
- Detailed specifications
- Home delivery
- International shipping options
Disadvantages:
- Cannot inspect before purchase
- Delayed support response
- Shipping time (though many kits ship from UK/US warehouses)
- Potential customs issues for international orders
Best For: Confident buyers who’ve researched thoroughly and prioritize value.
Local Bike Shops
Advantages:
- Immediate inspection
- Professional advice
- Installation services available
- Faster support for issues
- Supports local business
Disadvantages:
- Higher prices (20-40% markup typical)
- Limited selection
- May not carry conversion kits (focus on complete e-bikes)
- Staff may lack e-bike conversion expertise
Best For: First-time converters wanting professional installation and local support.
Manufacturer Direct
Buying directly from kit manufacturers offers:
- Best prices
- Guaranteed authentic components
- Direct customer service
- Comprehensive warranties
- Latest product versions
The electric bike kit & battery collection exemplifies manufacturer-direct shopping, providing complete kits with free shipping from UK and US warehouses, 1-year warranties, and responsive technical support.
Final Recommendations: Choosing Your Perfect Kit
After reviewing all factors, here are specific recommendations for different rider profiles:
Best Overall Value: 48V 1000W Complete Kit
For most riders seeking excellent performance without excessive cost, a 48V 1000W system with 16-17Ah battery delivers:
- Sufficient power for varied terrain
- Adequate range for daily use (35-60km)
- Legal off-road capability
- Professional-grade components
- Reasonable price (£380-£630)
This configuration balances power, range, reliability, and cost better than any alternative.
Best UK Legal Road Kit: 250W Front Wheel System
For riders prioritizing legal compliance on UK roads:
- 36V-48V 250W front hub motor
- 36V 13-15Ah battery
- Simple LCD display with speed limiter
- Cadence PAS sensor
- Complete road-legal certification
Front mounting simplifies installation and leaves rear wheel available for gear changes and puncture repairs.
Best Performance Kit: 52V 2000W Complete System
For riders wanting maximum power (private land use):
- 52V 2000W rear hub motor
- 52V 20-30Ah battery (extended range)
- Color TFT display
- High-current controller
- Reinforced components
Delivers 50-60km/h capability with exceptional hill-climbing torque.
Best Climbing Kit: Mid-Drive with Torque Sensor
For hilly terrain and mountain biking:
- 500W-750W mid-drive motor
- 48V 16-20Ah battery
- Torque sensor PAS
- Durable display
- Quality installation kit
Mid-drive leverages bicycle gearing for unmatched climbing efficiency.
Best Budget Kit: 36V 250W Basic System
For cost-conscious commuters on flat terrain:
- 36V 250W front or rear motor
- 36V 10-13Ah battery
- Basic LCD display
- Cadence sensor
- Essential accessories only
Provides electric assistance at minimal cost while maintaining reliability.
Conclusion
Electric bike conversion kits with battery included have matured into reliable, affordable solutions for transforming any bicycle into a powerful e-bike. Whether you’re seeking legal UK road compliance, extreme off-road performance, or anything between, modern kits deliver professional results at a fraction of complete e-bike costs.
By understanding your specific needs—power requirements, terrain, legal considerations, and budget—you can select the perfect kit that transforms your existing bicycle into the ideal electric ride. With proper installation, maintenance, and care, your conversion kit will provide years of efficient, enjoyable electric cycling.
Ready to join the electric revolution? Start by assessing your current bicycle, determining your power needs, and exploring complete kit options that include everything necessary for successful conversion. Your electric cycling journey is just 30 minutes of installation away from becoming reality.